Sunday, 18 March 2012

Trollkin Champion Update and Haqqislam from Infinity

So! It's been a busy few days for me. I travelled home from Durham on Friday on a surprisingly smooth, and, even more surprisingly, on-time, train journey. There's been a lot of packing and unpacking, a lot of washing and clearing away but I'm more-or-less settled in now and happy to be home. Family occasions and visits have meant I haven't had a great deal of time to paint recently, but there are some things to show you...


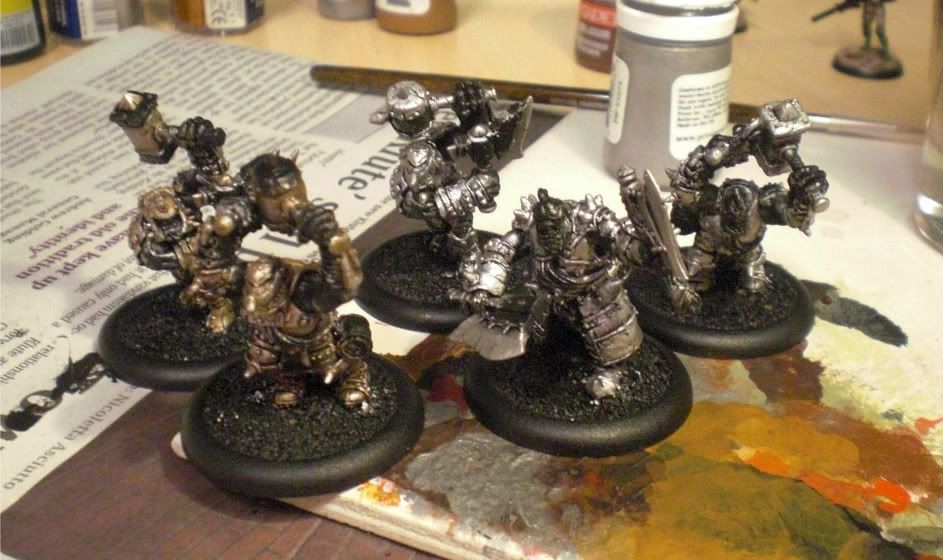
To start with, there is some progress on the Trollkin Champions. First, they've all had their bases painted (don't worry, they'll look more interesting when the grass and snow is added). Secondly, their armour is now pretty much done. After I got a look I was happy with on my test model I applied the same techniques to the others and I'm quite happy with the dirty, rusty look I think I've achieved.

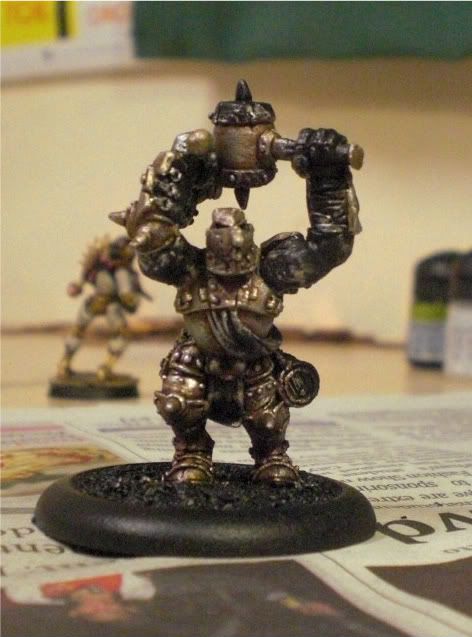
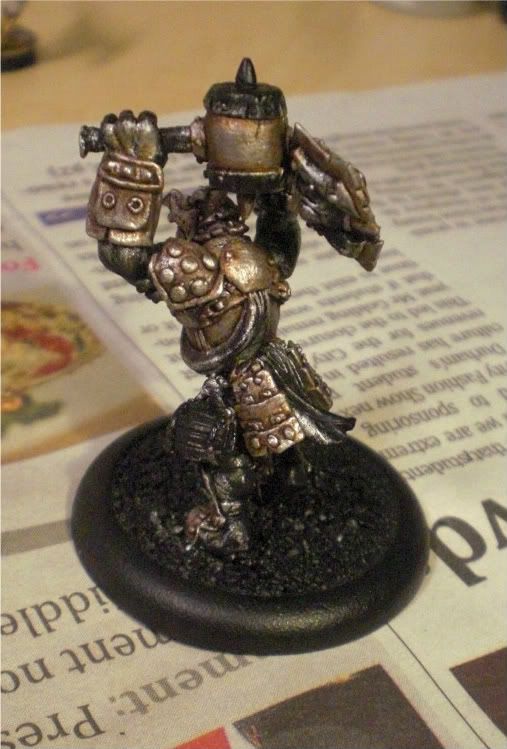
Now, I've also been working on the test model, who is a little way ahead of the rest. This guy has had the brass/gold bits of his weapons completed as well as his skin. I'm happy with the gold and this will be the next thing to be applied to the other four Champions. The skin was a little (read: a lot) harder because I was ambitious (read: stupid) enough to attempt some two-brush blending...

Yeah, it was harder than those videos made it look. It's a very difficult technique - a combination of getting the right paint consistency and then applying just the right amount of water to it in order to blend it into the layer underneath. I started with a solid layer of Trollblood Base, which I then darkened by mixing it with some Midnight Blue and painting this into the recesses. That's where things got a bit messy. In trying to use the wet brush to blend the shade into the mid-tone I ended up making it into something of a wash... Which was not my intention at all.

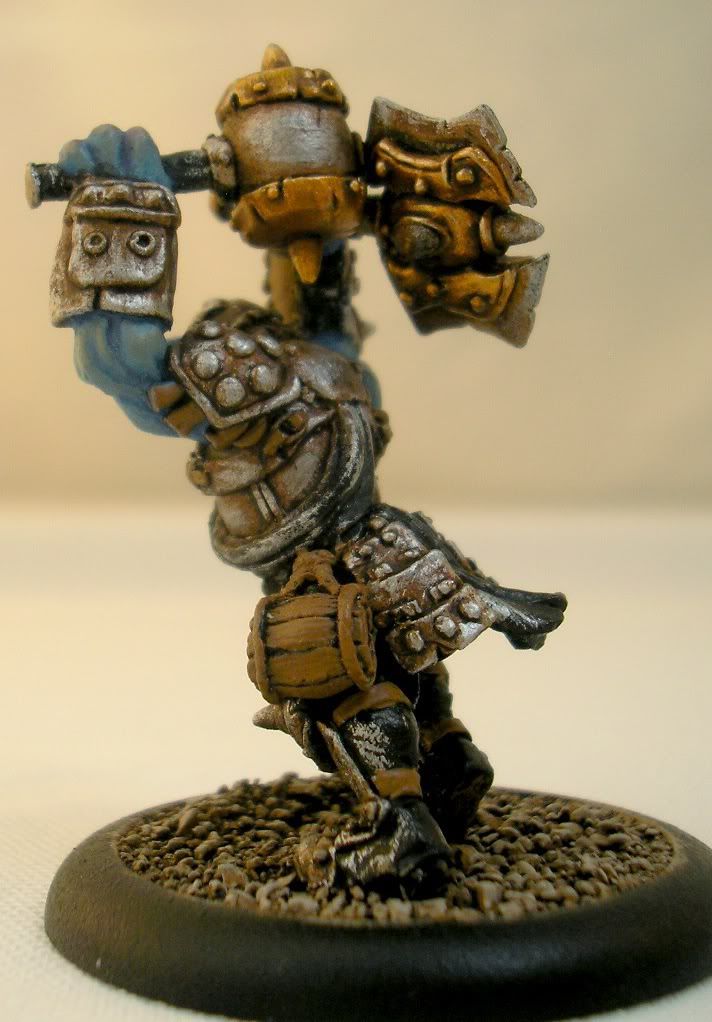
So I had a bit of cleaning up to do before I attempted to highlight the skin. This I did in three stages. The first layer was something like a 2:1 mix of Trollblood Base and Trollblood Highlight, the second was a 1:2 mix and the last layer, applied only to the very highest bits was pure Trollblood Highlight. Finally I painted on a very thinned-down glaze of Hormagaunt Purple Wash mixed with some Scab Red on to the knuckles, to suggest some bruising and natural colouration. I'm not too appalled by it, it is a first attempt after all, but I'd really appreciate hearing what you guys think of the skin.

I'm going to keep working at my test model in order to figure out my 'paint-recipes' for the Trollblood force. I'm still no wiser on to colours I'd like to use on their tartans... I'm think about just going for a green base with stripes in red and perhaps another colour at the moment. Has anyone got any suggestions? What would work and, more importantly, contrast well in this colour-scheme?


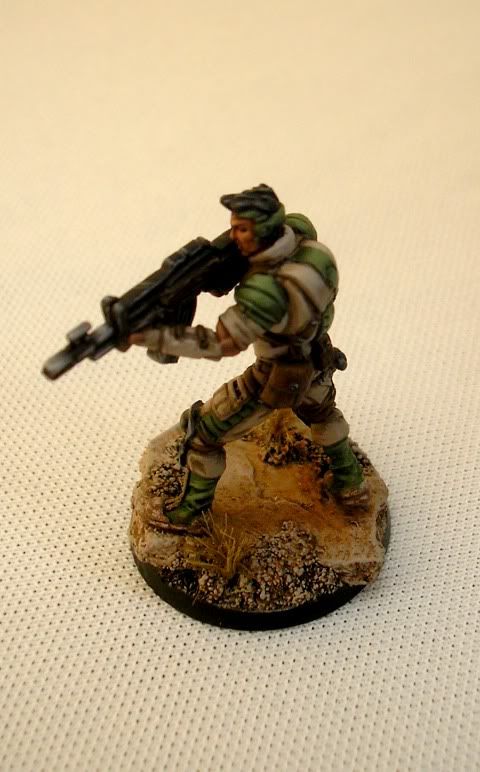
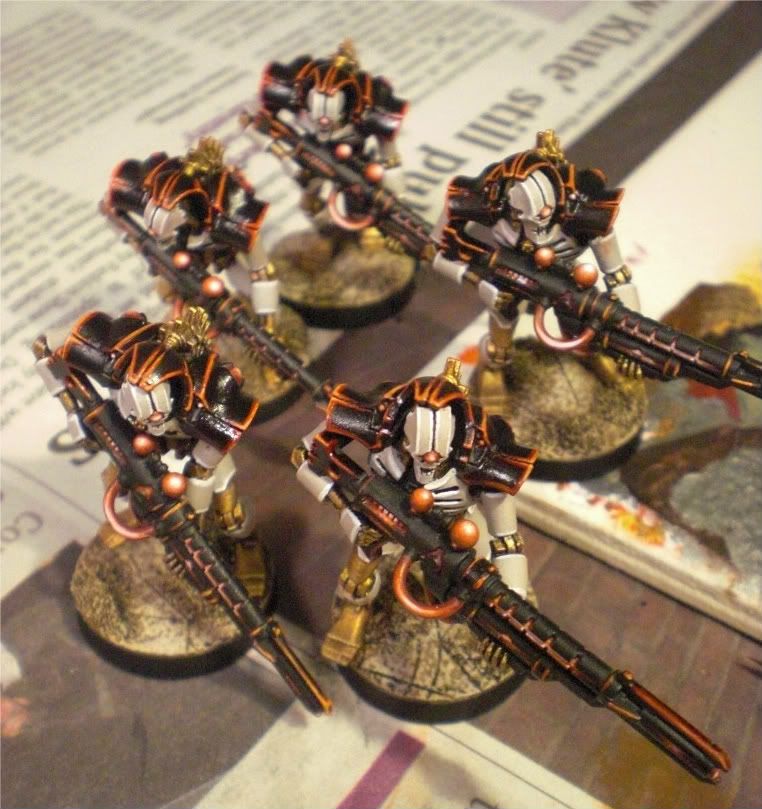
Finally, just another little thing to show you all here. This is the first model I have painted for a small Haqqislam skirmish group for the table-top war-game called Infinity. I have six more to paint before I have a little force that I can feasibly have some games with, so you'll hopefully see some progress on those in the future. I tried out a bit of non-metallic metal on this guy, just on the metal parts of the gun. It's not great but it's something I'd never tried before and something that I want to use my Infinity models to work on. I really like the desert-camo style and I chose these guys mainly for the painting-variety that they would offer me.

See you all soon and, as always, thanks for reading. As it's Mothers' Day, I'll leave you all with this:

Tuesday, 13 March 2012

An Invaluable Addition - The Ottlite

Look what arrived today!


Oh yes ladies and gentlemen, it's my very own 13W Ottlite Task Lamp which was delivered this afternoon. Firstly I can't emphasise how much I already love this thing. I'm not sure how I've managed so long without one. Seriously, I've got images in my head of me and my Ottlite running towards each other in slow-motion, across a big flowery meadow to the sound of 'Is This Love?' by Whitesnake.


Okay but seriously, this thing is fantastic. It looks a bit funky, yes, but acceptably so in my opinion. It seems sturdy, and certainly something I wouldn't mind stuffing in my suitcase if I'm going travelling anywhere. Which reminds me: it came with a European Travel Adapter! Perhaps not the most exciting thing on the surface of it... BUT, I travel to Holland quite often to see my family over there and those damn adapters always seem to go missing somehow... Quite chuffed I have actually managed to find one. Well... buy, I suppose.

I haven't even talked about using it yet. Basically, it's phenomenal. I've never realised how much difference it actually makes when you paint under a daylight bulb. First of all, colours are so much more vivid. You see them as you would see them if you looked at your model on a nice, sunny day (we do get a few! Don't be so cynical...). Secondly, I'm seeing things on the model so much more clearly. I know very little about the workings of lamps - I wasn't interested in Physics - but I'm surprised by how bright this lamp actually is, and it's only 13 Watts. I haven't had a chance to paint for an extended period of time today, so I can't comment on how it affects my eyes over a long period of time, but when I did paint my eyes felt comfortable. Wait, can eyes feel comfortable? I don't know... But that's how they felt. Like they weren't straining to see, like they had to make no effort.

Negatives? None I can think of really... It emits a VERY quiet hum when you have it on, but it's nothing worse than the hum a laptop emits when running. In fact, it's rather a lot less.

Oh, and the coolest thing about it? It doesn't have an on/off switch. To turn it on you just lift it up. And that's magic as far as I'm concerned.

A great man once said, "I love lamp."

I finally see what he means.

Sunday, 11 March 2012

The Blue Fellas

Now that the Deathmarks are done I've got a little bit of time to work on one of my own hobby projects. Warmachine and Hordes have really been taking off amongst the hobbyists at Heroes and Legends and I've wanted to get involved for a long time. I've been told, and I have seen (I had a demo game with one of the Legends), that it's a fantastically tactical and fun game with some really nice models. The armies are all so full of character it was hard to choose one to start with. In the end, I settled with blue-skinned, Scottish-inspired rabble-rousers, the Trollbloods.

I was particularly inspired (read: amused) by that enemy of all things sober, Borka Kegslayer. As you can guess by his name, he likes a good drink almost as much as he likes a good brawl. I thought he'd be a really fun character to base an army around.

The first thing I knew I wanted in a Trollblood army were some Trollkin Champions. In game terms these guys are HARD.


The Champions in progress
I bought these boys a while ago and they've been glued together for ages - I just hadn't managed to get round to painting them yet. A quick base-coat of Chaos Black and these guys were ready to have some paint applied. I grabbed by trusty drybrush, whacked out some P3 Cold Steel and painted all the metal parts of their armour (of which there is A LOT). I want their armour to look really rusty and battle-worn, to which end I followed the layer of Cold Steel with a very watered-down wash of Bestial Brown. It still looked a little bit too bright to me, so I followed that with a wash of Badab Black mixed with Scorched Brown (very watered-down again), but only into the recesses. Finally I went over some of the raised areas again with a thin layer of Cold Steel. 
I'm relatively happy with the result but I'm unsure of how it will look on the model as a whole when it is completed. Because of this I've decided to paint up this chap on the right as a sort of a test before I complete the others, just to make sure I know I'm on the right track.

Their skin will be painted in the manner typical of Trollbloods and I'll be attempting some two-brush blending on these guys, which I've never tried before. Using tutorial videos found here and here to help me along I'm just going to give it my best shot. As of yet I am undecided on how to paint their tartans. The plan is to get the rest of the model painted (skin, leathers, base and brass) to get an idea of what sort of colours would work well. At the moment I'm leaning towards a snowy base, perhaps with some foliage, but we'll see how it looks when I get to that stage. All in all I'm really rather excited to be painting models that are so different to anything I've done before.

In other news, I've bought myself a daylight-bulb, portable desk lamp from Ott-Lite and it should be arriving in the post sometime this week. I've read positive reviews, particularly here, and I think both my eyes and my painting would benefit from some Vitamin D. 

That's all for today folks, stay tuned to see how I get on with the Trollbloods and my new gadget. Comments and criticisms are appreciated as always.

Au revoir!

Friday, 9 March 2012

Necron Deathmarks - Done!

Definitely time for another update.

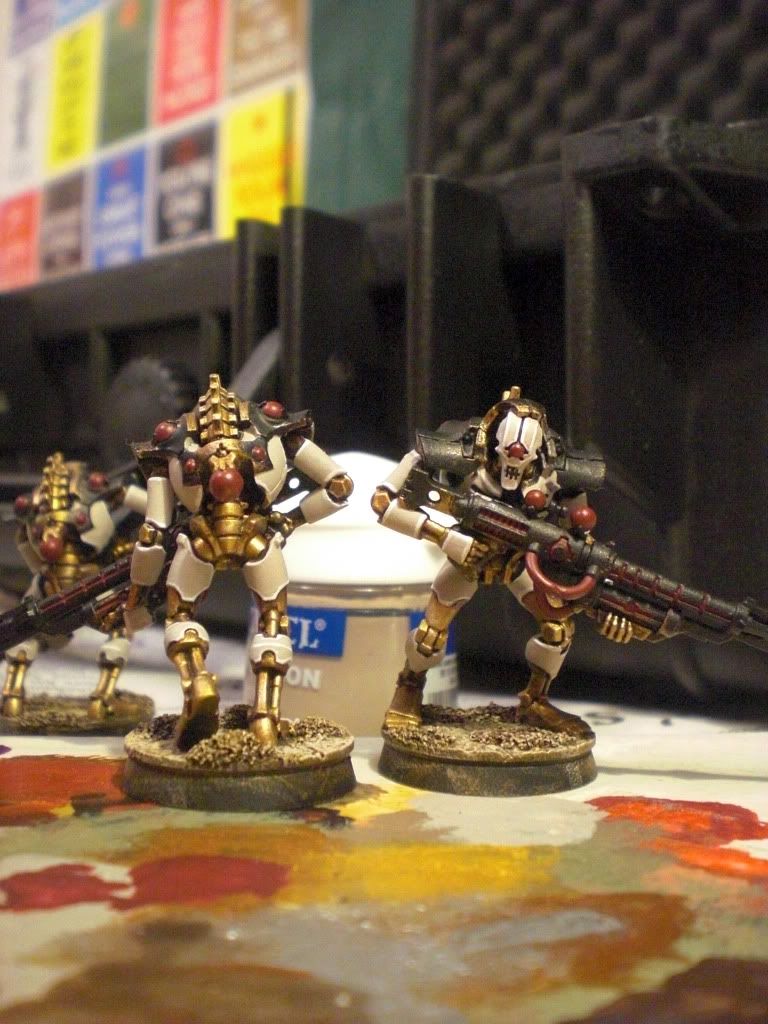
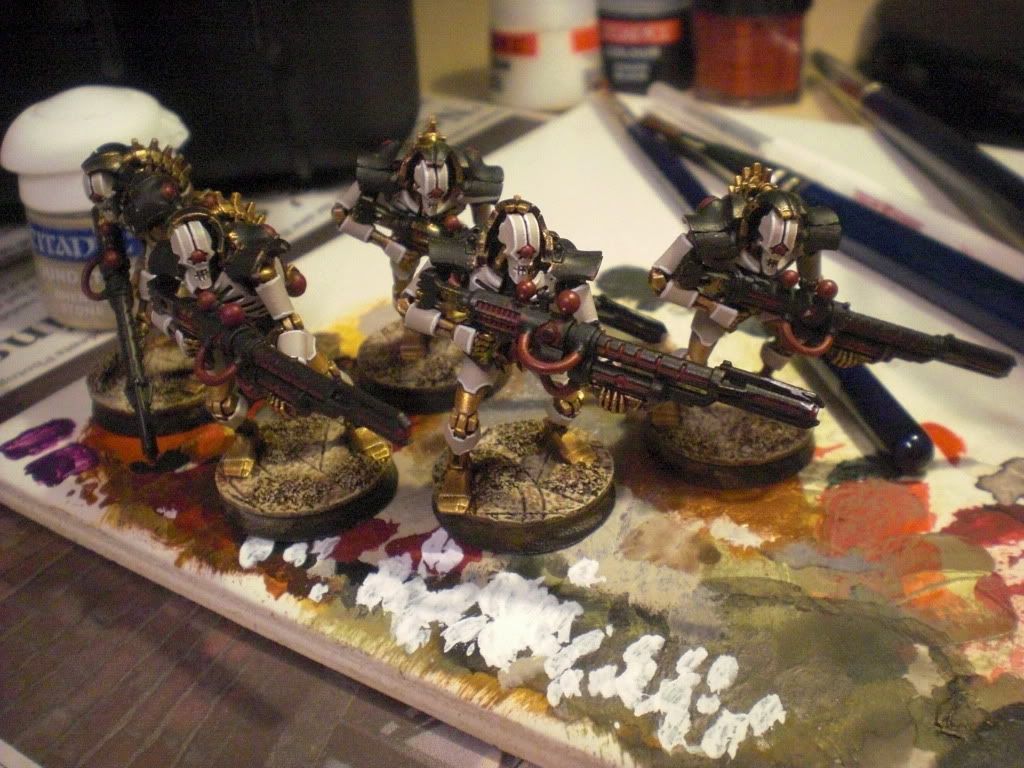
I've grabbed a hold of my friend's camera to take a couple of pictures of the, now finished, Necron Deathmarks. Progress has been slow of late, due to a bit of a pile-up in the essay department. It's getting near the end of term here at Durham and I've somehow managed to leave all my work till the last minute as per usual... Never seem to learn from my mistakes... 

But. They are finished! Hurrah!

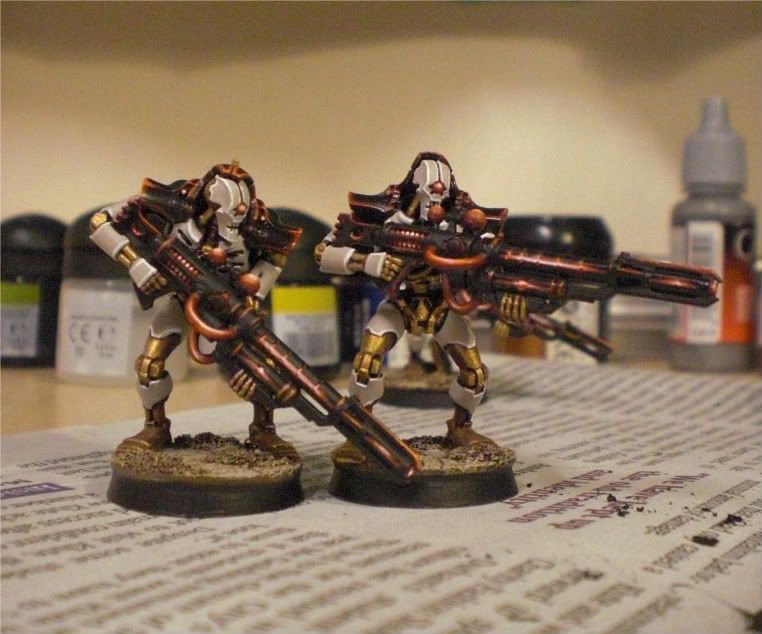
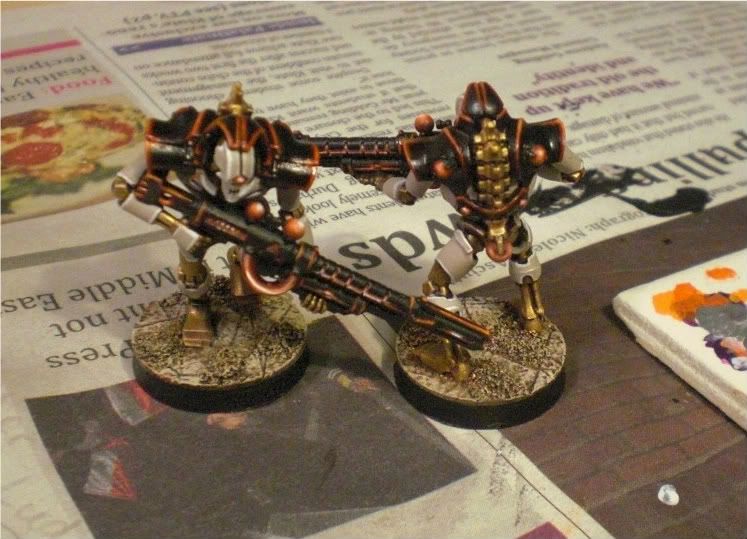
Since last time I updated the blog I cleaned up the black areas with a coat of Chaos Black and I got started on the various bits of lighting and highlighting that are so important on these models. Inspired by the way I've seen them painted over on sites like coolminiornot and by the guys on the 'Eavy Metal team, I wanted to try and capture the idea of a glow coming from within the guns, without straying into the realm of object source lighting. That's a can of worms I don't want to open just yet!

So the original plan was to highlight their shoulder pads up to a white on the very edges, which I did on one model, before deciding against it. I'm not sure what changed my mind, I just thought it looked a little bit too bright... I wanted to keep the pads looking dark - a sort of mysterious, alien obsidian. To this end I highlighted them Scab Red, then Blood Red, Fiery Orange (just on the very edges and corners) and finally gave them a very watered down wash of Tamiya Clear Red ink. This last stage helped to mute the orange somewhat, and blend all the layers together. It has also resulted in a bit of a gloss finish that I think helps suggest the alien obsidian look I was going for.

To differ the hues of red (if only very slightly) I used some fleshy tones for the parts of their guns that give off light, before slapping some Skull White on to really get them looking a bit brighter. I tried my best to get a nice effect, but I suppose only you can be the judge of that. 

I'm quite happy with the finished result, and I can only hope that my client will be too.

I'm definitely glad to have got these guys done, despite having had a rather busy few weeks. It should quieten down towards the end of next week, deadlines will have been met and the pressure will be off. At least, until exams. 
Oh joy. 

Anyway, there's another project on my painting desk now, but more on that in the future, I'm quite excited about this one...

Happy painting!

Tuesday, 21 February 2012

Wizards! And some progress...

Hello hello!

So, progress has been slow of late. It's partly my fault and partly the fault of the mountain of work I need to get through before the end of term. Got a few essays to write, which requires reading, planning and all sorts of things I didn't need to bother with when I was at school - University is quite a different experience! I have managed to make some progress on the Necron Deathmarks though. Their metal parts, as well as the carapace, are now finished. The aim was to achieve a really clean, solid colour using Dheneb Stone, with a simple edge highlight of white to make it pop. As I've said, these are for a commission and credit for the scheme has to go to Jon - I love the choice of colours and I think they look fantastically appropriate on these robot-skeletons.

The next stage is to clean up the black areas, which are to be highlighted with red, through to orange and white, in the style that is often used for Dark Eldar armour. I love the very alien effect that such a style produces. Next, I will be taking care of the various orbs and lenses dotted around these models. Some of them will be pulsating with electrical energies and some will be painted as sources of light. The plan is to get these finished in the next week or so, but it might be a bit tight what with various deadlines creeping up on me...

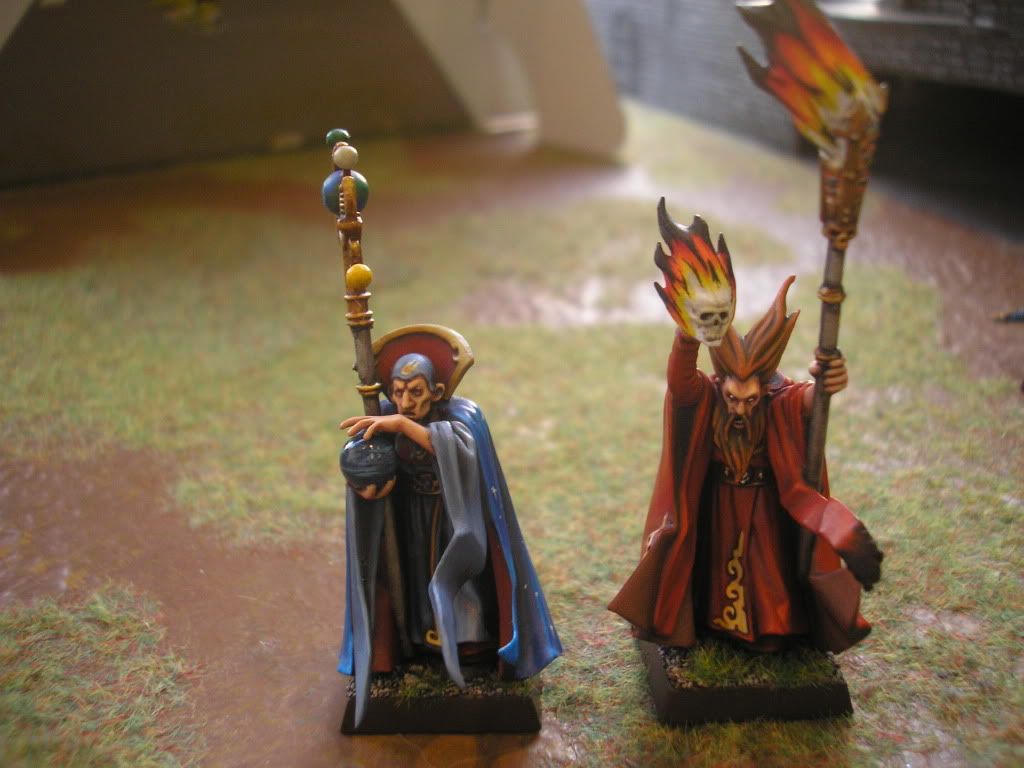
Empire Wizards


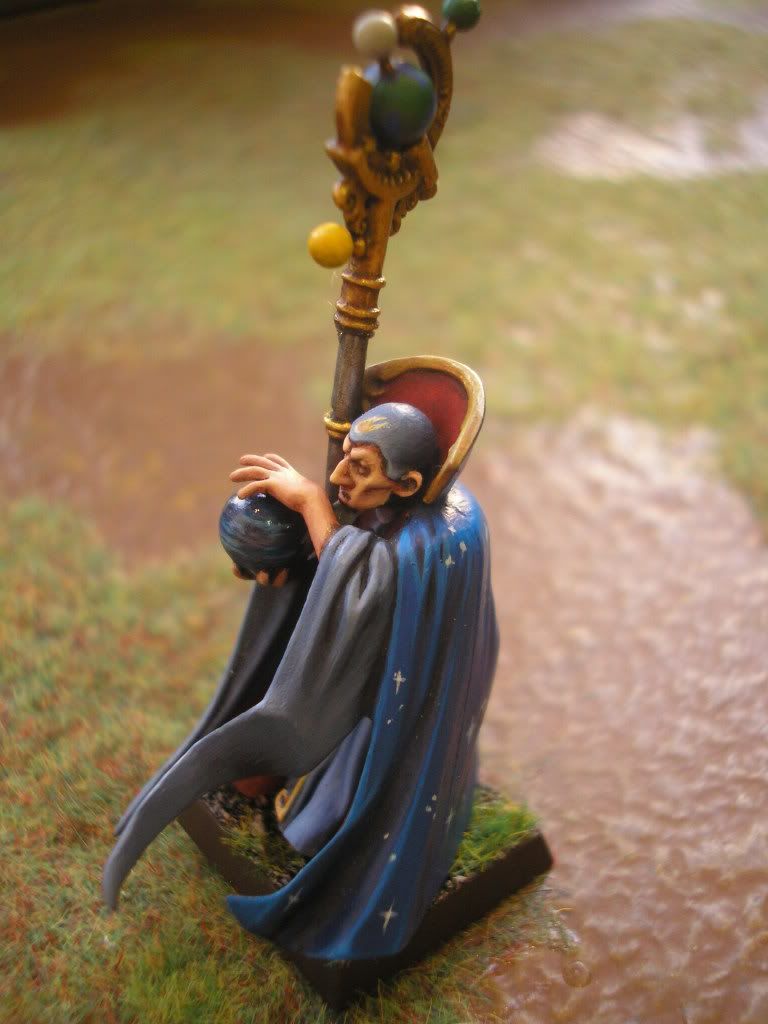
Aside from current projects I have a few more completed models that I wanted to post up here. These two are Empire Wizards from the Warhammer Fantasy range that I painted a while ago, just for kicks really. They live at Heroes and Legends while I'm away looking down on that bustling world of hobby from their towers... well, cabinet.

I tried my best to achieve a really smooth gradient of dark to light on their cloaks and to just keep the paint-job generally tidy in all areas. For the fire I took my cues from an old Masterclass from White Dwarf, where the 'Eavy Metaller used this effect on Skulltaker. I'd always wanted to try it out and there was plenty of opportunity with this Fire Wizard. For both these models I wanted to paint them in the style of 'Eavy Metal and get them looking as much as possible like the pictures on the box. It's not the same standard of course but I am still fairly happy with these models and I'm proud that they're still on display in the shop.

I was asked recently how I did the stars on the cloak of the Celestial Wizard so I thought I'd just mention it here. Essentially it's quite simple: Using a very thin brush, and a steady hand, make a faint cross shape using a lighter version of the cloak's highlight colour - in this case a bright blue. The trick is to paint the cross 'from the outside in', which is an abstract way of saying that when you finish a line, your brush should finish at the point where the horizontal meets the vertical. Usually this will mean that a small blob will amass in the centre of the cross, which is what you want - this looks a bit like the way a star might glimmer. If you feel your star needs more shine, using the same technique to paint an 'X', centring on the mid-point of the cross will make it look more like those stars you used to see in primary school nativity plays. After doing all this in the same colour, use white to do the same thing again, but much more faintly, allowing some of the colour underneath to show through.


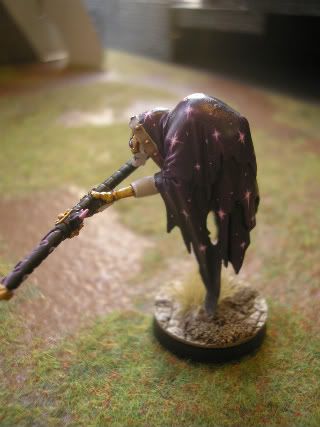
While this wasn't the exact technique I used for the Celestial Wizard, I 'refined' it, if you will, when painting Jon's excellently converted Necron Cryptek.

Anyway, I better get on with some work... Does blogging count as procrastination?

Adios!


Saturday, 4 February 2012

Some Malifaux Zombies and Current Projects

Hello all,

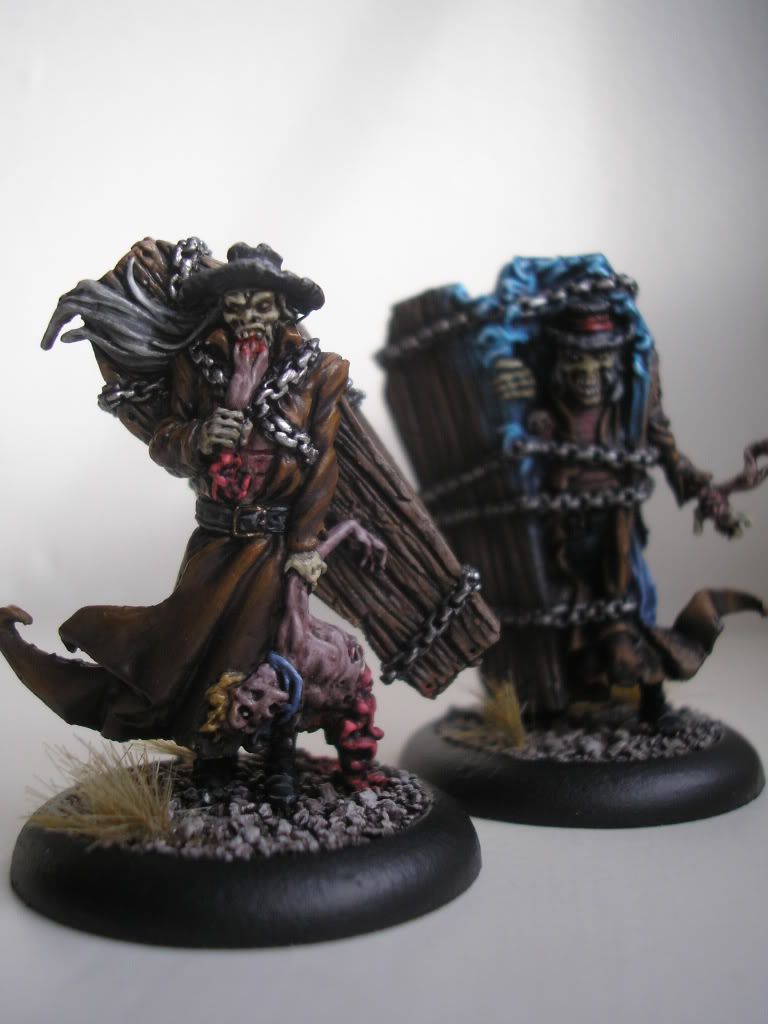
Two Death Marshals
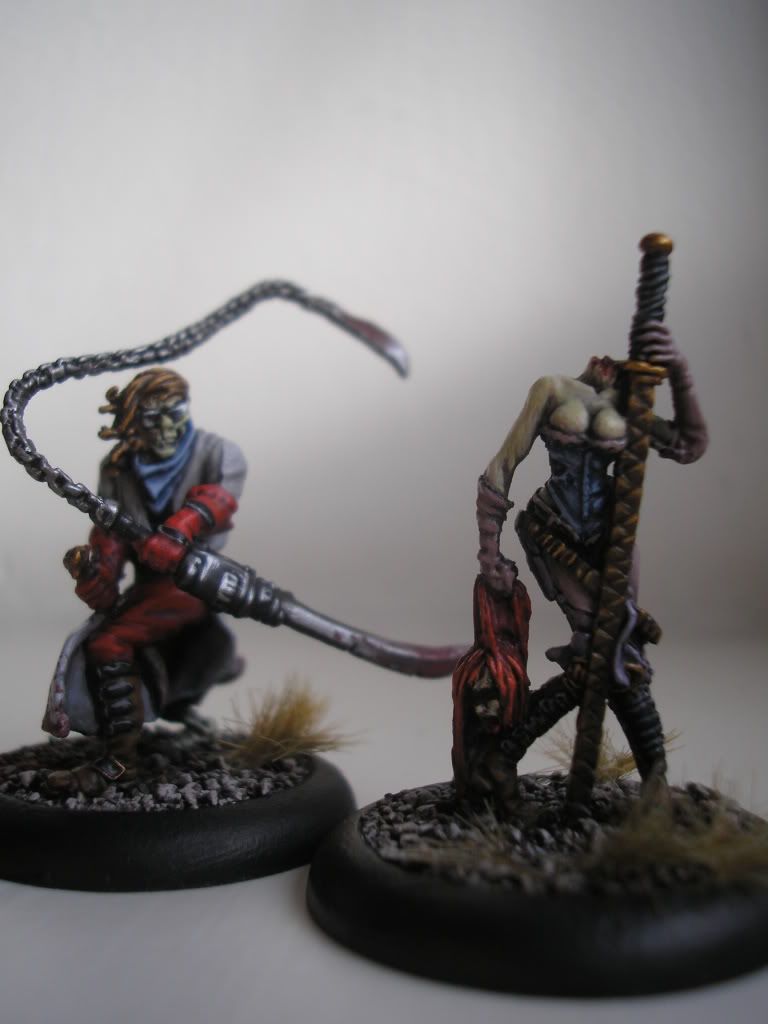
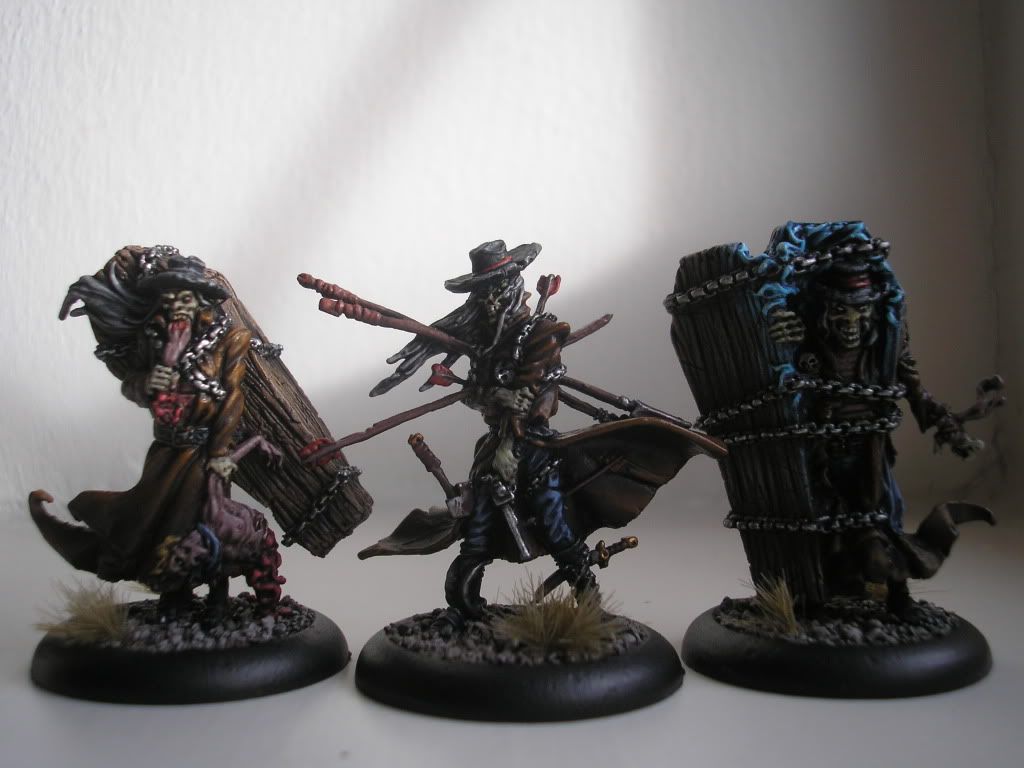
So it's been a few days since my first post and it's about time I put something else up here for you chaps and chapettes to have a look at. As I've mentioned before I do a good deal of commission painting and this 'Dead Justice' set from the skirmish game Malifaux was one of the first jobs I got through the guys at Heroes and Legends.

I had a lot of fun painting these miniatures, the sculpts were really nice and there's always something darkly humorous about the models that Wyrd produce. I must say however, I had rather a lot of difficulty with a certain zombie who seemed intent on removing the various arrows and spears from his body that were making him into something of a pin-cushion. Honestly, I'm pretty sure every single extremity of this miniature was intent on falling off... Anyway, a lot of super-glue later and I had a model that would actually hold together long enough for me to get some paint on it. Talking of extremities, I was somewhat surprised by the size of Lady Justice's, shall we say, 'weapons'. I'm very much of the opinion that such over-sized additions to female miniatures are somewhat unnecessary and don't do a great deal of good for the way that the war-gaming hobby, or its main players (I mean the companies) are viewed by others. That aside, I realise that Wyrd's approach is often comical and tongue-in-cheek and quibbles like this aren't a serious problem.

Lady Justice and her blade-swinging compadre
As you can see, the three dead Death Marshals are painted predominantly in shades of brown, against which the blue flames of the chap emerging from his casket, and the gore of the fellow having a little snack, contrasted well. All their skin was done in a similar style using mostly Citadel's Rotting Flesh with some shading in purple hues and a highlight up with Bleached Bone. I wanted to keep the colour palette fairly limited in the same way that the guys at Wyrd had painted these models, which limited me to browns, reds and blues, along with the grey of the metal and the coat of the zombie on the far left. I wanted to maintain a realistic level of lighting and kept the overall tone rather darker than the style in which models like this are sometimes painted. As I hope you can see from the above photo, I'm trying to learn that not every fold or crease on the clothing of a miniature need be highlighted, it can just be a little bit too much sometimes. I won't take you all through an exhaustive stage-by-stage painting process as it would be far too long and boring, but if you have any questions about the techniques used please feel free to comment or drop me an e-mail and I'd be more than happy to share what I did with these models.

All three Death Marshals - guess which one caused me the modelling trouble!
The above set of models are the standard to which I paint my commissions for such games as Malifaux, Infinity or other skirmish war-games where the squads are small and the models are somewhat more expensive than your average plastic infantryman for games such as Warhammer. I charge the box-RRP for painting commissions such as these.

Work in Progress
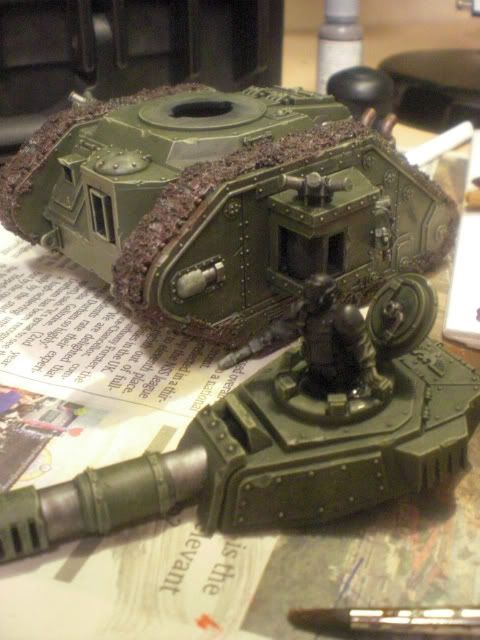
As for my current projects I have a Leman Russ on the painting table, to be added to my (ever so slowly) burgeoning Imperial Guard force. So far I've given it a Catachan Green base-coat, a cursory drybrush and a light wash of Badab Black in the areas that needed more shading. I've picked out the metal areas, which have been washed with black also and the first layer of the mud on the tracks has been painted. There's still a way to go with this girl but hopefully I can have her looking battle-ready soon.
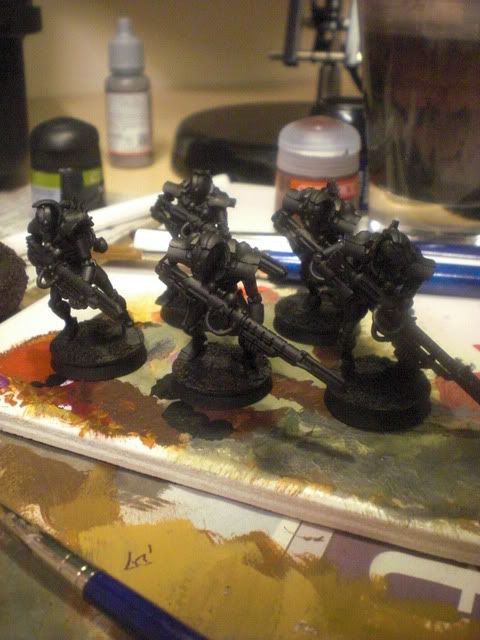
Deathmarks on the desk

For my next commission, I have a squad of Necron Deathmarks to paint for a friend of mine. I have already painted 20 Immortals and a Lord for his army (pictures of which will have to wait I'm afraid as they've not immediately accessible, being around 350 miles away), as well as the Cryptek which I posted a few days ago. These guys will be done in a similar scheme with a few small differences to mark them out from the rest.

Thanks for reading, let's get to work.

Monday, 30 January 2012

A Beginning

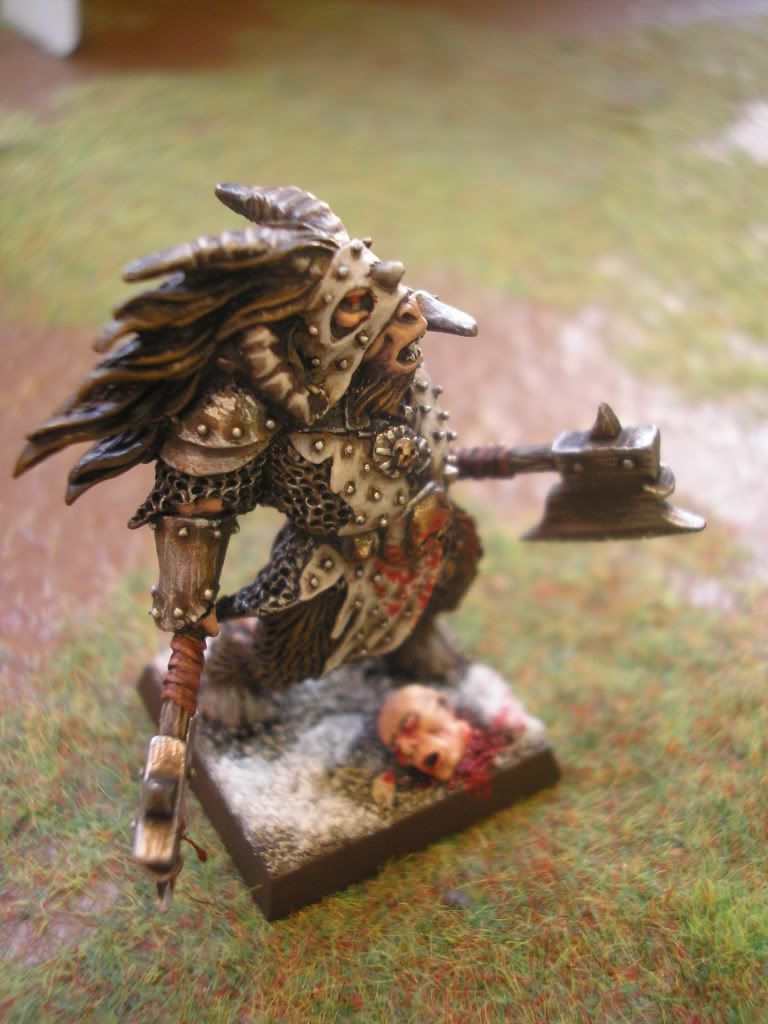
Beastman Lord
Dear readers,

This is most exciting and a little bit unnerving. Starting a blog for the first time is quite unlike any other feeling - you'll probably know what I mean if you've done a similar sort of thing. Putting a bit of yourself, or your work, on the internet feels like exposing oneself, not quite in the way that that flasher sitting next to you on the tube will expose himself, but in the way of laying bare the workings of one's mind to a world full of people. Certainly I am somewhat nervous about this but I hope that I can settle into it as something that I will come back to regularly to post little bits and bobs about both myself and the miniature-painting that is both my hobby, and, if you consider the earning of money to be indicative of such, my job. I find it hard to consider painting as 'work' in the sense that an office-job might be considered, it is just far too enjoyable! The reality is that painting is my hobby and I am simply lucky enough to be able to make some money from it.
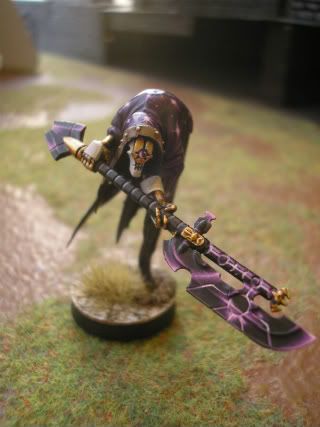
Necron Cryptek


I suppose that seeing as this is an introduction of sorts, I should tell you all a bit about myself. My name's Ollie and I have recently turned 20. Miniature-painting and war-gaming have been a part of my life for half of those 20 years so I should say I have had some experience. While I enjoy the gaming aspects of hobbies such as Warhammer, Infinity, Malifaux and Hordes to name but a few, the creative element is my gig. I think the reason behind this must be obvious when I think back to how much time I spent with Lego as a child (honestly, vast quantities of the stuff) and how much I have always enjoyed creating something where previously there was nothing. When it comes to miniatures, they are the blank canvas onto which I can paint whatever I want, in whatever way I like. It might sound cheesy, but it's the truth.

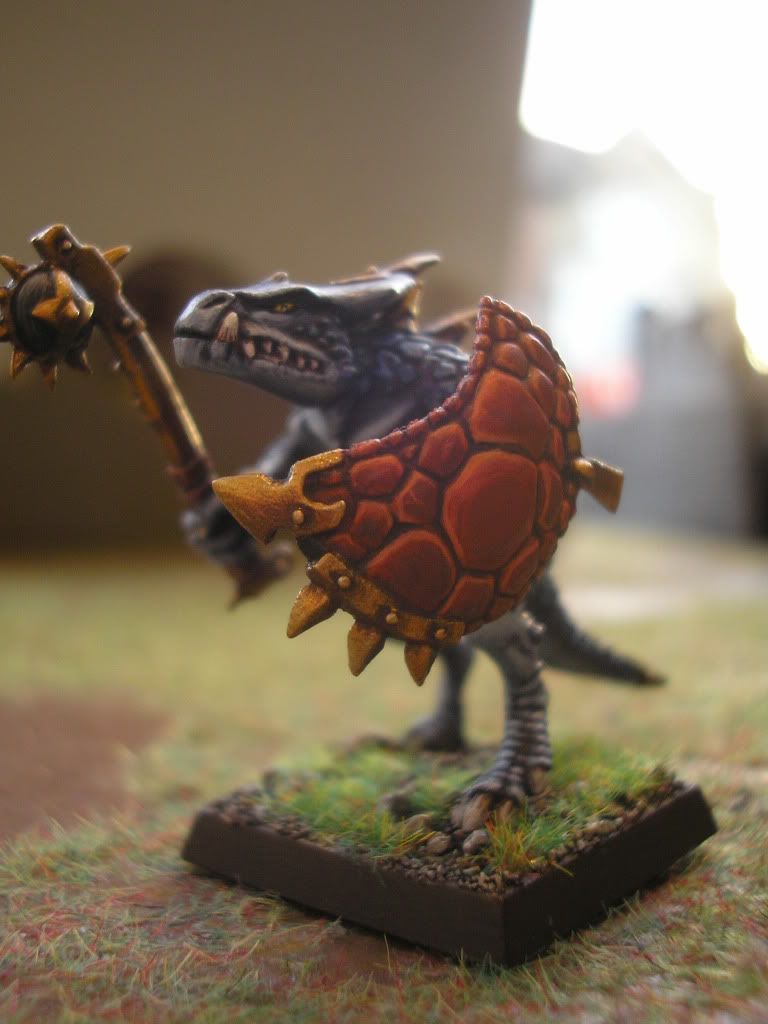
Lizardmen Saurus Warrior


For a while I have been frequenting a delightful centre of gaming and hobbying called Heroes and Legends Games. Their prices are great and the atmosphere in their store is always fantastic - if you are in the neighbourhood of Surbiton head on over there and check it out (this is not an advertisement spiel, I am genuinely recommending you better your life by paying them a visit, you won't regret it.) Anyway, having been going to the shop regularly for a couple of months I was asked whether I might like to do a bit of commission painting on their behalf. I duly agreed and, Heroes and Legends coffee mug in hand, sat down to paint a bunch of models for display in the shop, as well as launching straight into a few commissions. Of course, it is not only myself that paints models for the store, but Ed and Animatronica also, who should be duly given credit for their great work. I do not, under any circumstances, want to sound big-headed enough to have you conclude that I am the only commission painter in town - I am one of the Heroes and Legends team and we offer our services to all.

I should probably conclude this first post by saying that I hope you have enjoyed the beginning of my blog and that I hope you will be coming back here now and then to see whether I've made any progress. The aim of this whole malarkey is really to display some of the models I have painted in the past, as well as showing you lovely people some of the current commissions (and hopefully some of my own stuff) that I will be working on in the future. If you have anything to say or ask please get in touch, it's always appreciated!

Thank you for reading,
Ollie