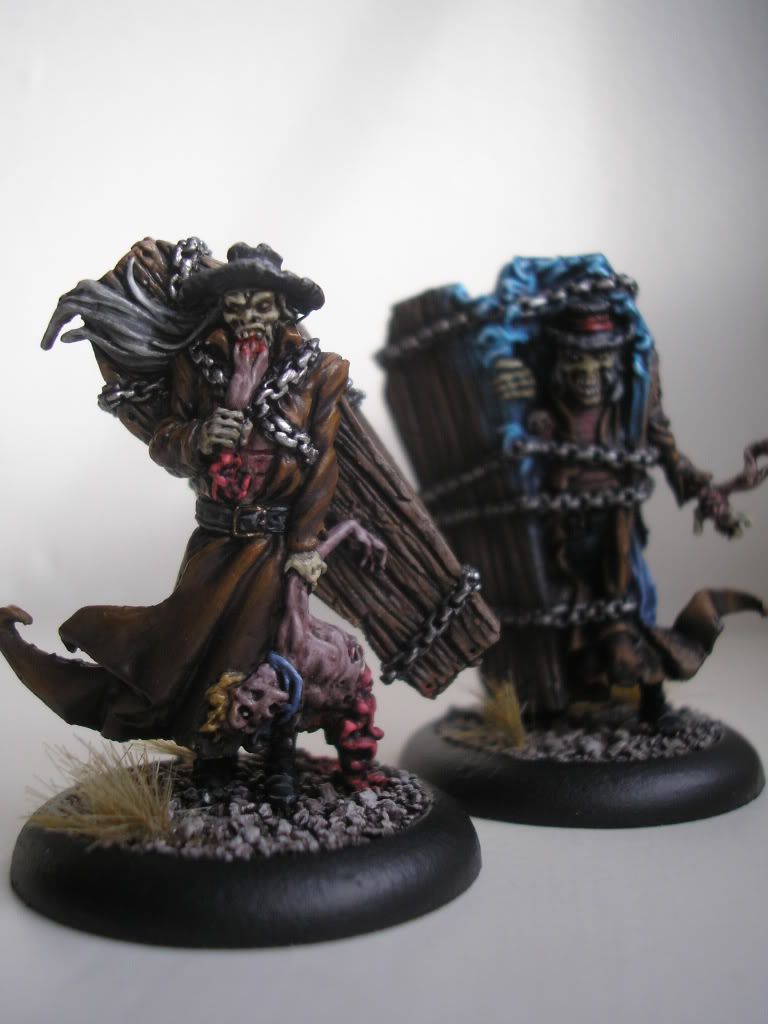
Showing posts with label Malifaux. Show all posts

Wednesday, 3 December 2014

An Imperial Knight and the Ortegas

Well it's been a hell of a long time since I posted anything on the blog... I've not given up on painting just yet though (although I haven't done any for a couple of months now and I'm really starting to get the itch). I'll soon be heading home for the Christmas break and I'm looking forward to picking up a paintbrush again - I think I have a copy of Space Hulk waiting for me... Can't wait!

In the mean time, I thought I'd just throw up a couple of things I did over the summer.

First, I had a crack at an Imperial Knight. These models are insanely detailed and it was really cool to work on a big model like this. Only have one picture of it as it was given to the customer upon completion...
Scary.

The flame effect was really fun, and fairly easy, to do. It just took time and a lot of carefully applied layers. But the beauty is that not a great amount more detail needed to be done and there was no messing around with transfers and such (usually these guys are covered in them - I know from experience, I've painting 5 of these guys now...).

If you haven't heard of Malifaux you really should have by now. It's a really enjoyable skirmish game for which they released a new rule-set about a year ago. In addition to the new rules, they have started producing (and re-producing) all their miniatures in plastic and the detail is INSANE. I have one or two plastic box-sets at home and will be returning to them over Christmas I'm sure.

Pictured here are the Ortega family in their original metal casting. I completed these just before Wyrd released the plastic version of the same gang... Sod's Law. The picture quality isn't great, so apologies for that.


As ever, thanks for reading. I hope to be posting up some more things over the Christmas break - we'll see!

Thursday, 22 March 2012

Malifaux Nightmare Teddy!

I've spent the last few days working on a model that has been sitting, primed and ready to be painted, for a long time. I'd completely forgotten about it until I got back home from Durham and in the midst of a whirlwind of brushes and paint I somehow seem to have finished Malifaux's Nightmare Teddy. Scary!

I forgot to include some standard 28mm models in the pictures for size-comparison, but take my word for it, this Teddy is BIG. Accordingly, I grabbed a nice big brush and applied a base-coat of Chaos Black and Scorched brown to his fur. From that I drybrushed Scorched Brown, progressing up to Bestial Brown and finally finishing with Snakebite Leather. The fur was relatively easy, I just tried to concentrate the lightest layers on the areas that would naturally receive the most light.

When the fur was done I started with a Vomit Brown base on the teeth, the bow-tie and the claws. I predominantly used Golden Yellow for the bow-tie, to which I added Bleached Bone for the final highlights. The teeth were given a fairly solid layer of Bleached Bone, leaving just a little bit of Vomit Brown around the edges, they were then given a very thin layer of Skull White on the parts of the teeth that stood out most. The claws were first given a wash of Devlan Mud - I wanted them to look a bit darker than the teeth - and then a layer of Snakebite Leather, concentrating on the ridges that would catch the light. Using a 1:1 layer of Snakebite and Bleached Bone I further picked out these ridges before finishing with a very thin line of pure Bleached Bone.


The slightly supernatural purple on his gums, ears and insides was painted with Liche Purple and gradually highlighted with layers that added Tentacle Pink and Fortress Grey. His nose was painted Dark Flesh and highlighted by adding gradually increasing amounts of Bleached Bone. The base was just painted grey to keep it nice and simply, before some tufts of Army Painter static grass were stuck on - this stuff is really nice by the way, it's the easiest-to-use and best-looking grass on the market.


I saved the boy till last and applied a base-coat of Mechrite Red to his shirt and Fenris Grey to his shorts. The shirt was done with layers that added increasing amounts of Blood Red, before adding in some Blazing Orange and Dwarf Flesh. I find that this combination is the best way to highlight reds - it doesn't look too orange, but doesn't go too pink either. The shorts (which I seem not to have captured - whoops.) were nice and easy, just layers of Fenris Grey mixed with Space Wolves Grey, gradually increasing the latter as the highlights get finer. His shoes were painted Scorched Brown and highlighted to Snakebite Leather.


Oh and one more thing, just to make him look a little bit more scary? BLOOD! I tried not to go overboard and just painted it round the bottom of his teeth (as if he'd just licked them clean) and a little dribble onto his torso. Blood was also applied to the wound on his left-hand side. A 2:1 mix of Tamiya Clear Red Ink and Scab Red gave me a really nice, slightly glossy and thick, mixture that I find looks quite realistic.


I left the Teddy to haunt one of the cabinets Heroes and Legends where he will live for a little while. Next on the list of things to do is another commission for my Necron-loving friend, this time it's four Command Barges, two of which have super big cannons on them (yeah that's the technical term, I looked it up). I'll put some progress shots up soon, these will probably take a bit of time!

Thanks for reading, I look forward to your comments and criticisms. Happy painting!

Saturday, 4 February 2012

Some Malifaux Zombies and Current Projects

Hello all,

Two Death Marshals
So it's been a few days since my first post and it's about time I put something else up here for you chaps and chapettes to have a look at. As I've mentioned before I do a good deal of commission painting and this 'Dead Justice' set from the skirmish game Malifaux was one of the first jobs I got through the guys at Heroes and Legends.

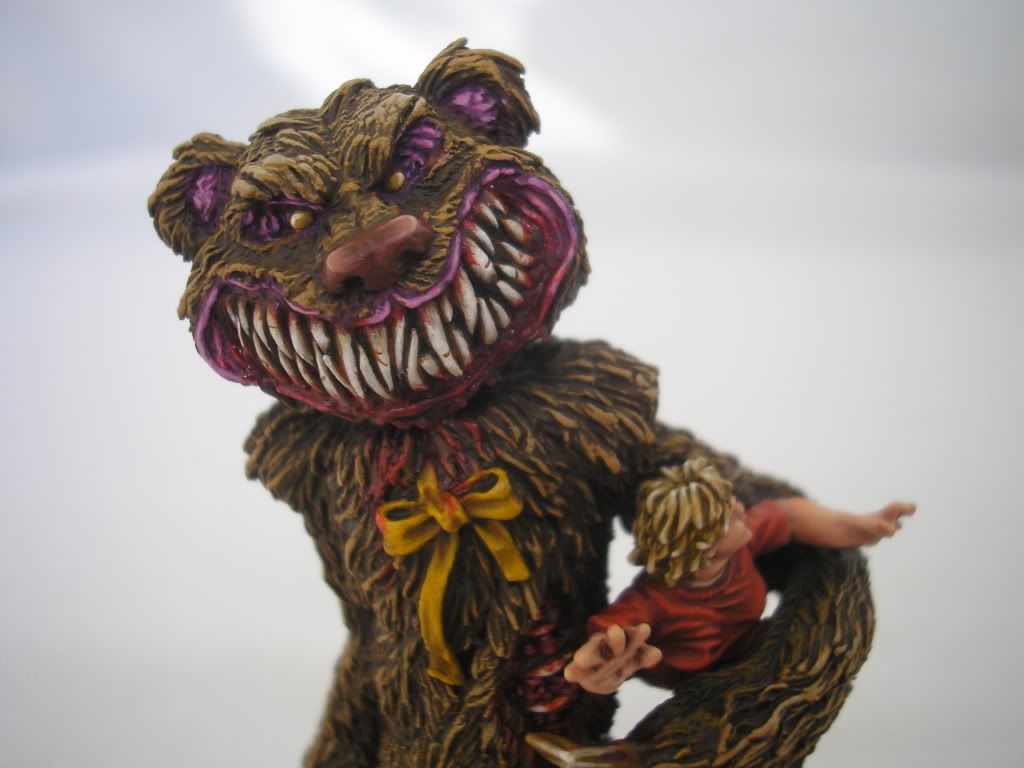
I had a lot of fun painting these miniatures, the sculpts were really nice and there's always something darkly humorous about the models that Wyrd produce. I must say however, I had rather a lot of difficulty with a certain zombie who seemed intent on removing the various arrows and spears from his body that were making him into something of a pin-cushion. Honestly, I'm pretty sure every single extremity of this miniature was intent on falling off... Anyway, a lot of super-glue later and I had a model that would actually hold together long enough for me to get some paint on it. Talking of extremities, I was somewhat surprised by the size of Lady Justice's, shall we say, 'weapons'. I'm very much of the opinion that such over-sized additions to female miniatures are somewhat unnecessary and don't do a great deal of good for the way that the war-gaming hobby, or its main players (I mean the companies) are viewed by others. That aside, I realise that Wyrd's approach is often comical and tongue-in-cheek and quibbles like this aren't a serious problem.

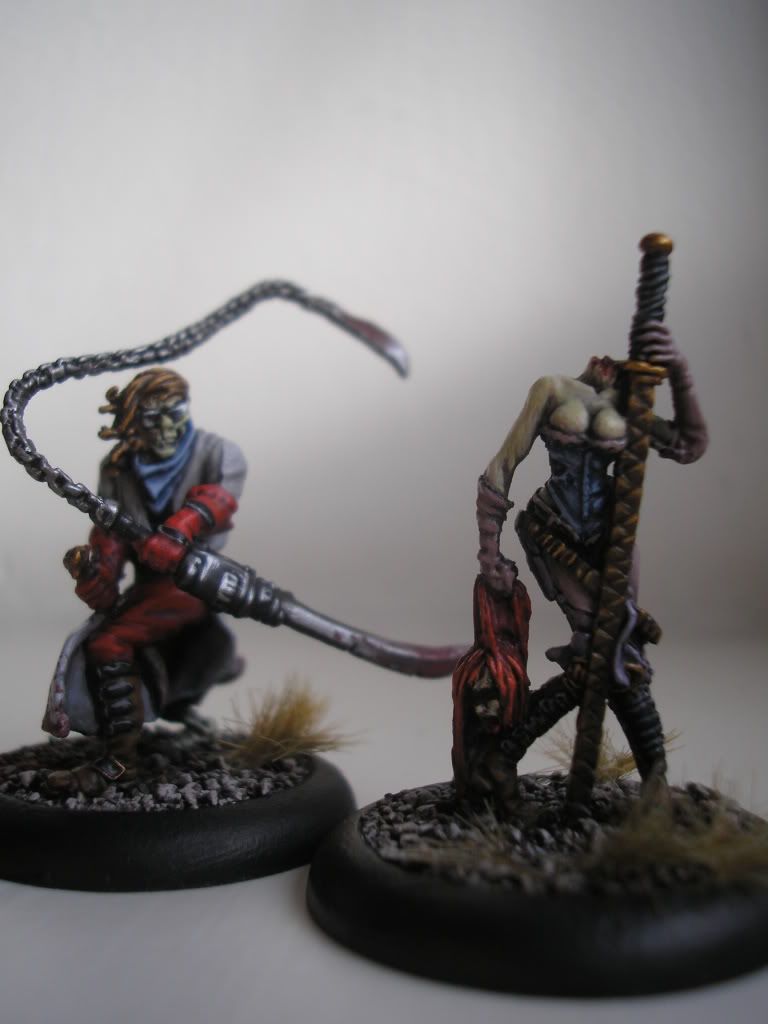
Lady Justice and her blade-swinging compadre
As you can see, the three dead Death Marshals are painted predominantly in shades of brown, against which the blue flames of the chap emerging from his casket, and the gore of the fellow having a little snack, contrasted well. All their skin was done in a similar style using mostly Citadel's Rotting Flesh with some shading in purple hues and a highlight up with Bleached Bone. I wanted to keep the colour palette fairly limited in the same way that the guys at Wyrd had painted these models, which limited me to browns, reds and blues, along with the grey of the metal and the coat of the zombie on the far left. I wanted to maintain a realistic level of lighting and kept the overall tone rather darker than the style in which models like this are sometimes painted. As I hope you can see from the above photo, I'm trying to learn that not every fold or crease on the clothing of a miniature need be highlighted, it can just be a little bit too much sometimes. I won't take you all through an exhaustive stage-by-stage painting process as it would be far too long and boring, but if you have any questions about the techniques used please feel free to comment or drop me an e-mail and I'd be more than happy to share what I did with these models.

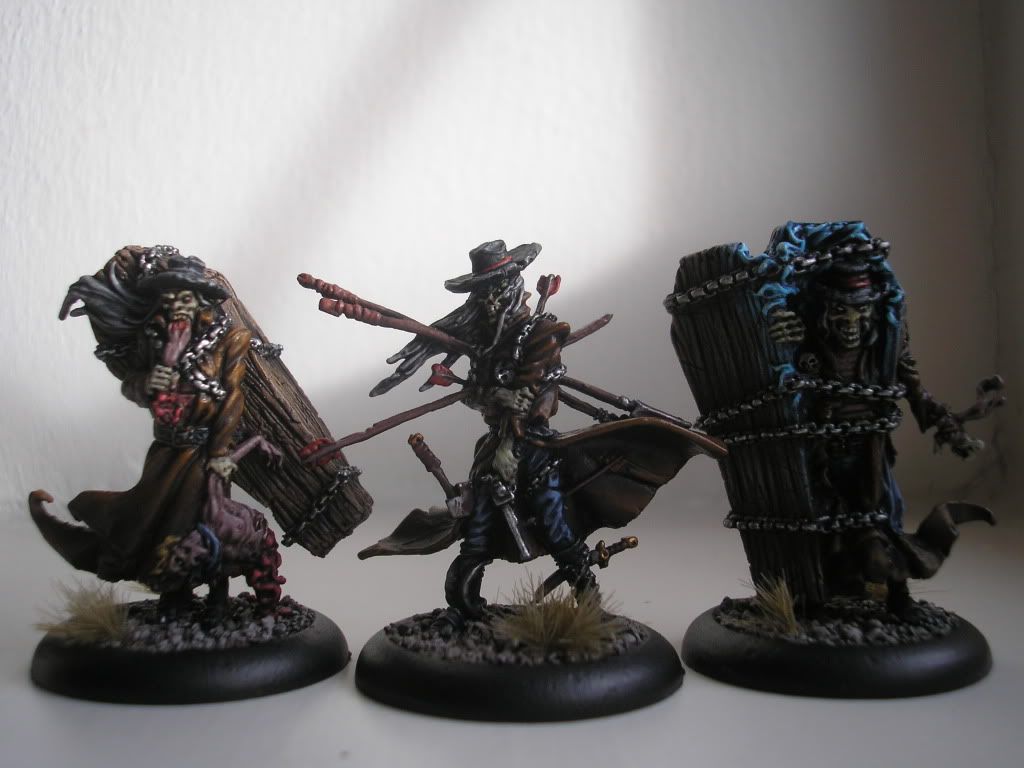
All three Death Marshals - guess which one caused me the modelling trouble!
The above set of models are the standard to which I paint my commissions for such games as Malifaux, Infinity or other skirmish war-games where the squads are small and the models are somewhat more expensive than your average plastic infantryman for games such as Warhammer. I charge the box-RRP for painting commissions such as these.
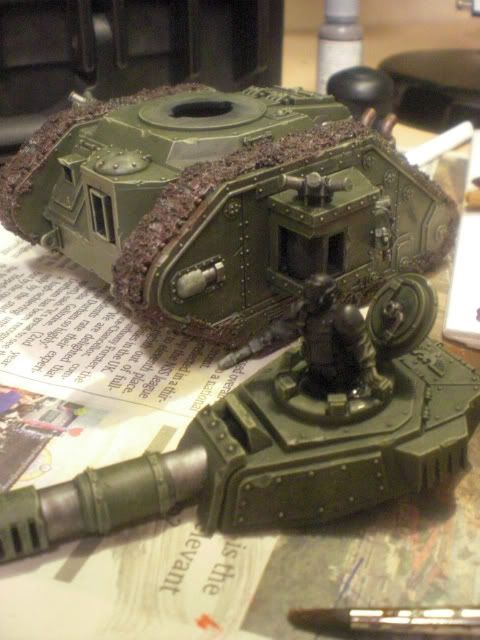
Work in Progress
As for my current projects I have a Leman Russ on the painting table, to be added to my (ever so slowly) burgeoning Imperial Guard force. So far I've given it a Catachan Green base-coat, a cursory drybrush and a light wash of Badab Black in the areas that needed more shading. I've picked out the metal areas, which have been washed with black also and the first layer of the mud on the tracks has been painted. There's still a way to go with this girl but hopefully I can have her looking battle-ready soon.
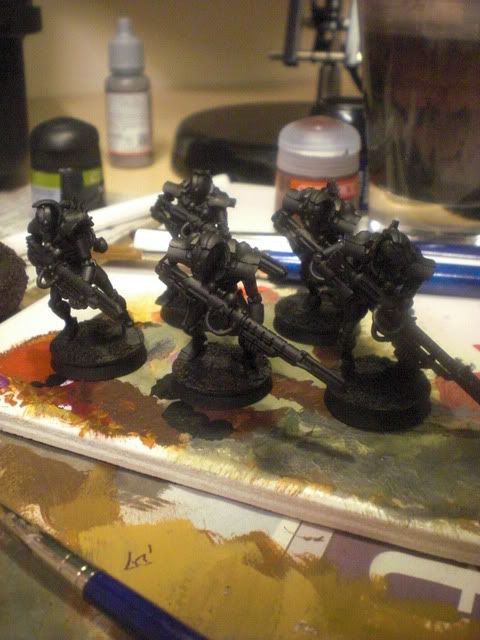
Deathmarks on the desk

For my next commission, I have a squad of Necron Deathmarks to paint for a friend of mine. I have already painted 20 Immortals and a Lord for his army (pictures of which will have to wait I'm afraid as they've not immediately accessible, being around 350 miles away), as well as the Cryptek which I posted a few days ago. These guys will be done in a similar scheme with a few small differences to mark them out from the rest.

Thanks for reading, let's get to work.